
Exterior
Mods
Outside of Red Rover – This page includes
exterior storage – the long compartment and the cargo box as well as a
number of mods to the exterior of our Roadtrek. These include awnings and the
“porch light”.
 Long
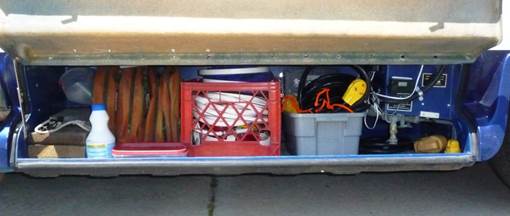
Storage Compartment. Red Rover is equipped with a very nice
long outside storage compartment.
Not only is this where the water and power connections are, it has a ton
of storage space. However to make
good use of that space, some organization is required. Here is what ours looks like.
Long
Storage Compartment. Red Rover is equipped with a very nice
long outside storage compartment.
Not only is this where the water and power connections are, it has a ton
of storage space. However to make
good use of that space, some organization is required. Here is what ours looks like.
By the
way, that long flexible hinge will eventually start to crack. Having a spare is a good idea. Don’t buy it from Roadtrek, they can be purchased from Moore Industrial
Hardware for a fraction of the cost.
http://catalog.mooreindhardware.com/keyword/all-categories/continuous-hinges-plastic?&plpver=1001&keyword=continuous+hinges%2c+plastic&key=product&keycateg=100&keyprod=3001510&SchType=2&refer=http%3a%2f%2fwww.mooreindhardware.com
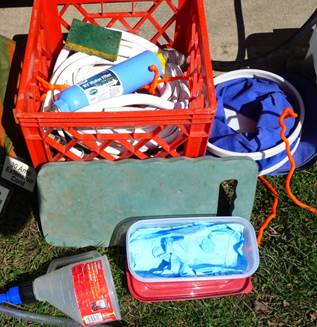
 Left
Side of Compartment. On the left we have two wood ramps for
leveling and some wood chocks.
These were made by a previous owner. On top of the blocks you can see a
funnel with a hose that is used for adding Clorex (in
white box) to the fresh water tank for sanitizing. And in the winter it is used to put RV
non-toxic anti-freeze (aka Pink Stuff) to the fresh water tank for winterizing. The shallow plastic box with the red lid
holds disposable plastic gloves for dumping the tanks.
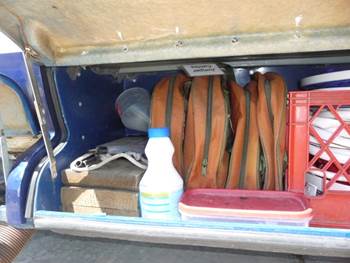
Left
Side of Compartment. On the left we have two wood ramps for
leveling and some wood chocks.
These were made by a previous owner. On top of the blocks you can see a
funnel with a hose that is used for adding Clorex (in
white box) to the fresh water tank for sanitizing. And in the winter it is used to put RV
non-toxic anti-freeze (aka Pink Stuff) to the fresh water tank for winterizing. The shallow plastic box with the red lid
holds disposable plastic gloves for dumping the tanks.
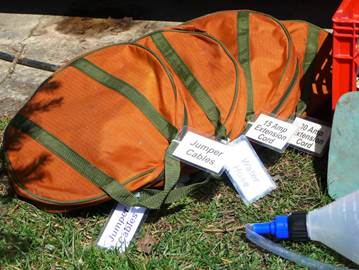
The
round brown zipper bags are made for storing jumper cables (purchased from
Amazon), but besides jumper cables we have one for the extra water hose, one
for the 15 amp and one for the 30 amp extension cords. The bags all have labels on them so the
contents can be easily indentified.
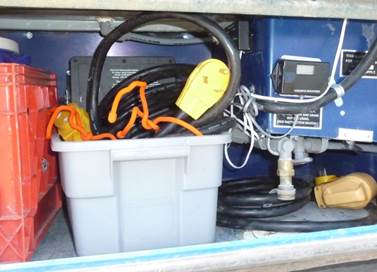
Right Side of Storage Compartment. The
right side has a plastic bin that slips underneath the power protection system
mounted to the back wall. The bin
contains water pressure adapter and a water hose quick release, electric power
adapters and some miscellaneous tools and funnels. The 30 amp cord is coiled and secured
with the orange ties and sits in the top of the bin (we do not use the
lid). The black display above the
water connection is one of two remote displays for the Progressive Industries
Power Protection system. The other
is inside (see electrical and electronics page) and there
is a switch to control which display is active.
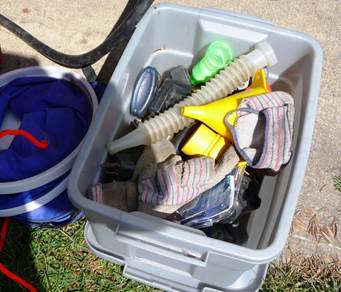
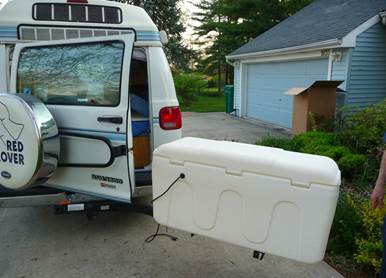
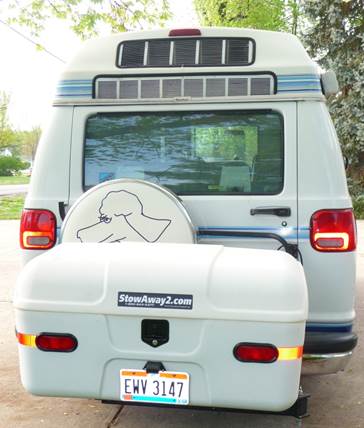 Stowaway2 Swingaway Max
Cargo Box. This box is great! It is well made (and not cheap) and it
swings completely clear of the big Dodge rear door. What we carry in this box varies with
the trip and what we plan to do during the trip.
Stowaway2 Swingaway Max
Cargo Box. This box is great! It is well made (and not cheap) and it
swings completely clear of the big Dodge rear door. What we carry in this box varies with
the trip and what we plan to do during the trip.
Rear Window Awning. While we were camped with
friends on
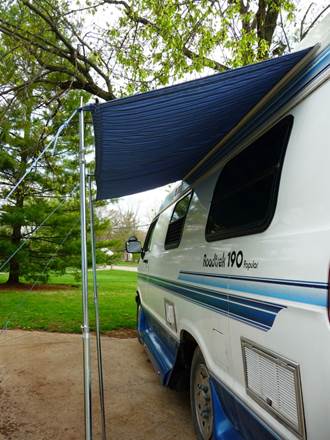
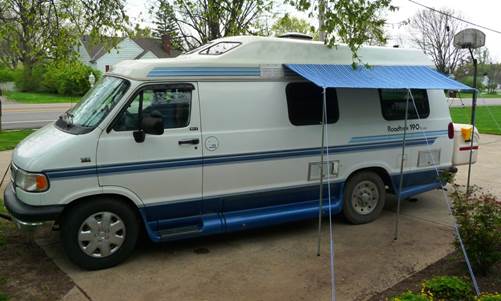 Driver’s Side Awning. We were
so pleased with how our rear awning turned out, we made one for the
driver’s side windows (and fridge vents). By the way, shading the fridge vents
helps propane fridges cool better. Initially we used the adjustable steel tent
poles shown in the photo, but we have since switched to fixed length fiberglass.
Driver’s Side Awning. We were
so pleased with how our rear awning turned out, we made one for the
driver’s side windows (and fridge vents). By the way, shading the fridge vents
helps propane fridges cool better. Initially we used the adjustable steel tent
poles shown in the photo, but we have since switched to fixed length fiberglass.
 We made both awnings double sided. The underside fabric matches that we
used on the TV cover and some pillow covers inside Red Rover. The top fabric looked good with Red
Rover’s original paint and stripes.
We made both awnings double sided. The underside fabric matches that we
used on the TV cover and some pillow covers inside Red Rover. The top fabric looked good with Red
Rover’s original paint and stripes.
The
side awning was made with the strip that slides into the track cut into three
pieces. This makes it easy to fold
in thirds and then roll it up.
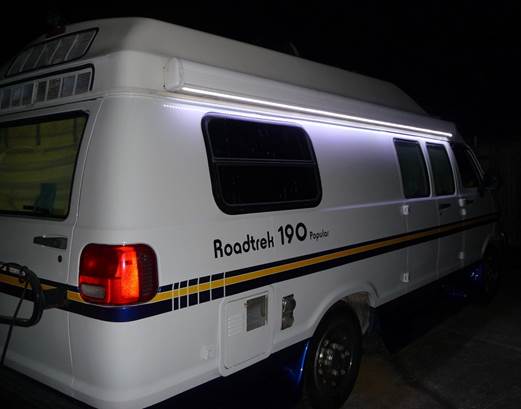 Porch Light. Red Rover is a 1995 Roadtrek and 1995 Roadtreks did not come with a porch light. We encountered a few occasions when we
wished we had one, so looked for one.
After buying one we thought would work, we stumbled across a better way. Use LED strip lights (the weatherproof
variety).
Porch Light. Red Rover is a 1995 Roadtrek and 1995 Roadtreks did not come with a porch light. We encountered a few occasions when we
wished we had one, so looked for one.
After buying one we thought would work, we stumbled across a better way. Use LED strip lights (the weatherproof
variety).
The
light is pretty bright so we mounted a dimmer to the shelf above the door. We run a wire out the door to
connect. We have a short wire and a
long wire for when the awning is extended.
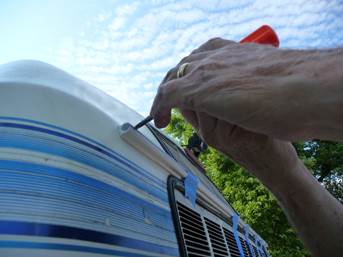
Tubing Trick. Tired of trying to fish leaves out from
between your awning box and the Roadtrek?
Then try the tubing trick. A
roll of clear tubing a couple of tools is all you need.
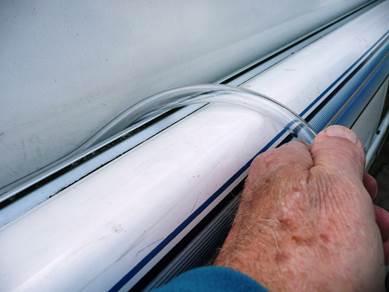
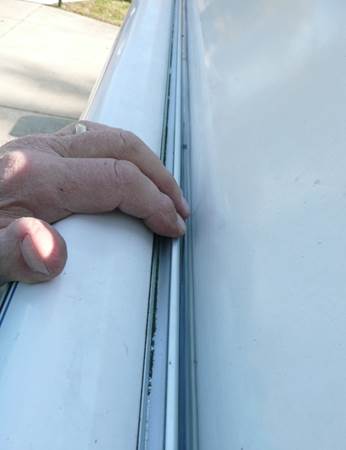
Feed
the tubing into the gap between the awning and the roof. Stuff it in with your fingers or a
screwdriver if necessary.
Now
there is no space for all those maple seeds to get stuck.
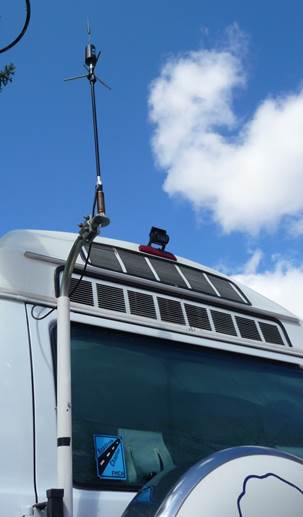 Wilson Antenna. We use the
The
antenna can be raised by removing the cotter pin that runs through the PVC and
conduit. The conduit can be raised
to lift the antenna higher and the cotter pin use to keep it up.
 Use a reminder to remember to lower
the antenna
before moving.
Use a reminder to remember to lower
the antenna
before moving.
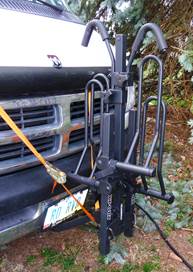
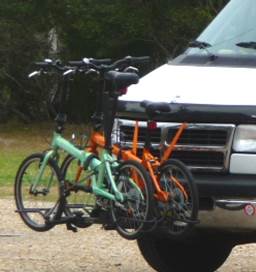 Bicycle
Rack. With the StowAway2 cargo box on
the back, there was no place for bicycles.
We mounted a receiver to the front bumper and use a
XPort bicycle rack we got from Performance Bike
Shop. We use a webbing strap to
stabilize the rack.
Bicycle
Rack. With the StowAway2 cargo box on
the back, there was no place for bicycles.
We mounted a receiver to the front bumper and use a
XPort bicycle rack we got from Performance Bike
Shop. We use a webbing strap to
stabilize the rack.
We have the 2 bike version
and it easily holds our good bikes, our mountain bikes or our folding
bikes. And it folds up when not in
use.
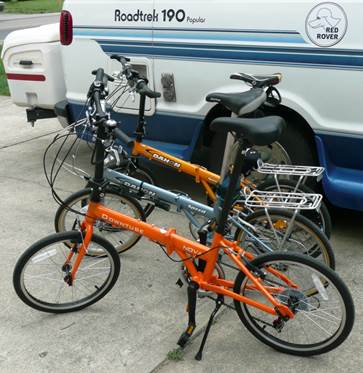 Folding Bicycles. We have a
lot of bicycles. However, for
casual campground use, we really like our Downtube
Nova folding bikes. We also have
some Dahon folding bikes, but the Downtube
bikes are a bit more stable and comfortable for casual riding. Folding bikes can be easily stashed
inside the Roadtrek if needed (like ferry crossings).
Folding Bicycles. We have a
lot of bicycles. However, for
casual campground use, we really like our Downtube
Nova folding bikes. We also have
some Dahon folding bikes, but the Downtube
bikes are a bit more stable and comfortable for casual riding. Folding bikes can be easily stashed
inside the Roadtrek if needed (like ferry crossings).
And the aluminum Downtube Nova is cheaper and lighter than the Dahons shown in the photo (Speed 8 and Speed Pro). Camping World sells a cheaper similar
looking folding bike, but it is much much heavier.
Downtube folding bikes are available online at: